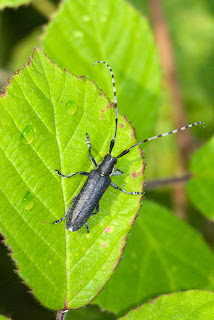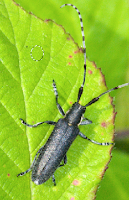
Open up your image, a leaf is a good starting point if you have one.
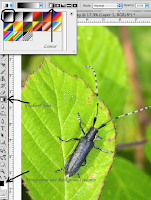
Go to Layer - New - Layer on the top tool bar click ok in the box. Once you have selected a new layer select the Elliptical Marque tool on the left hand tool bar. It's the second from the top as shown

Now make a small round or oval selection on your image. (picture right)
Next select the Gradient tool, making sure the foreground colour is black and Background white also select the Linear box on top toolbar as shown below.

Next using the gradient tool click and hold then draw a line from the top left of your selection to the bottom right once once you release you should end up with something like the picture on the right. Go to Select and Deselect on top tool bar.
Next go to the Layers pallet bottom right and select overlay and reduce opacity to around 50% as shown below.
Now go to Layer - Layer Style - Drop Shadow.

Copy the settings that you see in the right hand box. Once done then click on Inner shadow and copy the settings below.
Now click on Bevel and emboss and again copy settings like so.
NOTICE THAT DIRECTION IS DOWN NOT UP AND STYLE IS OUTER BEVEL. VERY IMPORTANT!!!!!
Now select brush tool a shown making sure that foreground colour is now white as you are now going to put in a highlight.
Select a small brush size between 10 and 15 hardness set to 100% and click on your water droplet around the top left area as seen above.
There you have it an nice little water droplet.
Now we not done yet as you know droplets come in all shapes and sizes so to do this you can use a couple of different tools.
duplicate your droplet layer before using the following tools.
drag it to where you want it positioned then liquify.
First the Liquify tool.
Go to Filter- liquify
when opened place the + over the top of your droplet click and hold and drag upwards, it takes a bit of practice but should look like a teardrop. Like below
You can make any shape you like using this tool just remember to duplicate for every droplet.
The other tool is Transform tool which can be found here
You can use all the tools from size to warp to make different shapes and sizes so let your imagination loose.
Have fun with this tutorial give it a go and post your results any problems let me know.


7 comments:
another very cool tutorial.
Hey that's cool. I think I'll still take a spray bottle out, but that's not always possible, so this is an excellent backup plan.
i can't wait to see if i can create a water drop. thannks
the staghorn ferns are not to common,they do best in tropics and sub tropics which is what we are in mid west Florida. they grow well inside and public gardens have them. they take many years to get this big, these are about 20 years old, that is why they are valuable. we inherited them 4 years ago. the baby is almost 2 years old now. and has doubled its size. it will grow those brown things and eventually the stick it is on will be covered completely. the big ones are in orange crates, but are completely covered.
I'm going to have to try this sometime! Great tutoring and thank you.
Now this is a cool thing! Thanks for sharing it!
Okay, I am impressed! That is so cool and I had no idea one could do that! Thank you for the tutorial -- will try it out.
Merci,
Genie
How cool! Thanks for this. I am going to try it out for sure!
Post a Comment