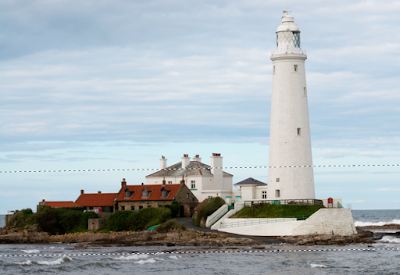
1. Pick an image that you think may be suitable. I thought I would use one of St Mary's Lighthouse in Northumberland.
2. Next select the gradient tool which looks like this
Make sure that it looks like this on top toolbar after selected. Select reflected gradient (Red Square)
3 Next select quick mask you will know if you have selected it as it should turn grey.
4. Now you have to decide where the point of focus will be, for this image i decided on the houses and base of lighthouse. This takes practice and for your image i suggest you use a point of interest.
5. Hover over your image and place cross hair at the centre of the point of interest, now click hold and draw vertically upwards from where you want the point of focus to be up the screen to the top of the area that you want to be in focus and release the mouse button. A red transparent line should appear. This may take several attempts to get right you want a small band that incorporates your point of interest.
You can see by the black arrow where i positioned the cross hair and how far I drew the line upward.
6. Now click the quick mask button again it should turn back to white and your image should look something like this.
7. Now the fun begins go to the top toolbar and select Filter-Blur-Gaussiun Blur.
move the slider until you are happy with the effect, don't over do the blurring. Once you are happy deselect. you should end up with something similar to below.
8. Next you have to make it look plastic. Select Image-adjustments-hue/saturation.
Move the saturation slider till your image looks plastic like a model.
9. Next boost the contrast go to image-adjustments brightness/contrast and move the contrast slider till you have a more realistic model effect.
The adjustments I have used for saturation and contrast are only guidelines as each image is different.
There you have it a Model Lighthouse....
Please try this yourself and let me know how you get on.


6 comments:
will try it later today, been on here for 2 hours now and have to take a break
Whew! I'll have to take notes before I attempt this. I am impressed with how you are able to show the steps. Thank you for the lesson.
Thank you fore sharing this. I will soon get photoshop, and I can not wait to try new things. It looks like a lot of phun:)
That's so cool! And something I had never thought about before, will have to try it out when I have a quiet minute. Thanks for your lovely comment, I had linked Ellen's name to Wikipedia but I guess my links don't stand out enough... Have a good week :-)
I think that will take some practice! You do it so well.
This looks amazing. Thank you for the step-by-step x
Post a Comment